
Getting Started
What Pilot Is
Pilot is a browser-based editor for the TC-Helicon VoiceLive 3 and VL3X. It connects to your device over USB using WebMIDI, giving you visual control over every parameter in every preset. That includes a large set of parameters the device's own screen never shows you, things that are only accessible through SysEx messages.
Edits happen in real time: turn a knob in Pilot and you hear the result on your VL3/x immediately. The app also handles preset management (browse, save, load, export) and can generate SysEx command strings for external MIDI controllers, so you can trigger parameter changes from a pedal, a setlist app, or anywhere else that speaks MIDI.
Browser Requirements
Connecting Your Device
Getting connected is straightforward. Here is the sequence:
- Power on the VL3/X.
- Connect a USB cable, USB-B Mini on the VL3/X side, USB-A on your computer side.
- Open Pilot in a supported browser (Chrome, Edge, Firefox, Opera, Brave, or Vivaldi).
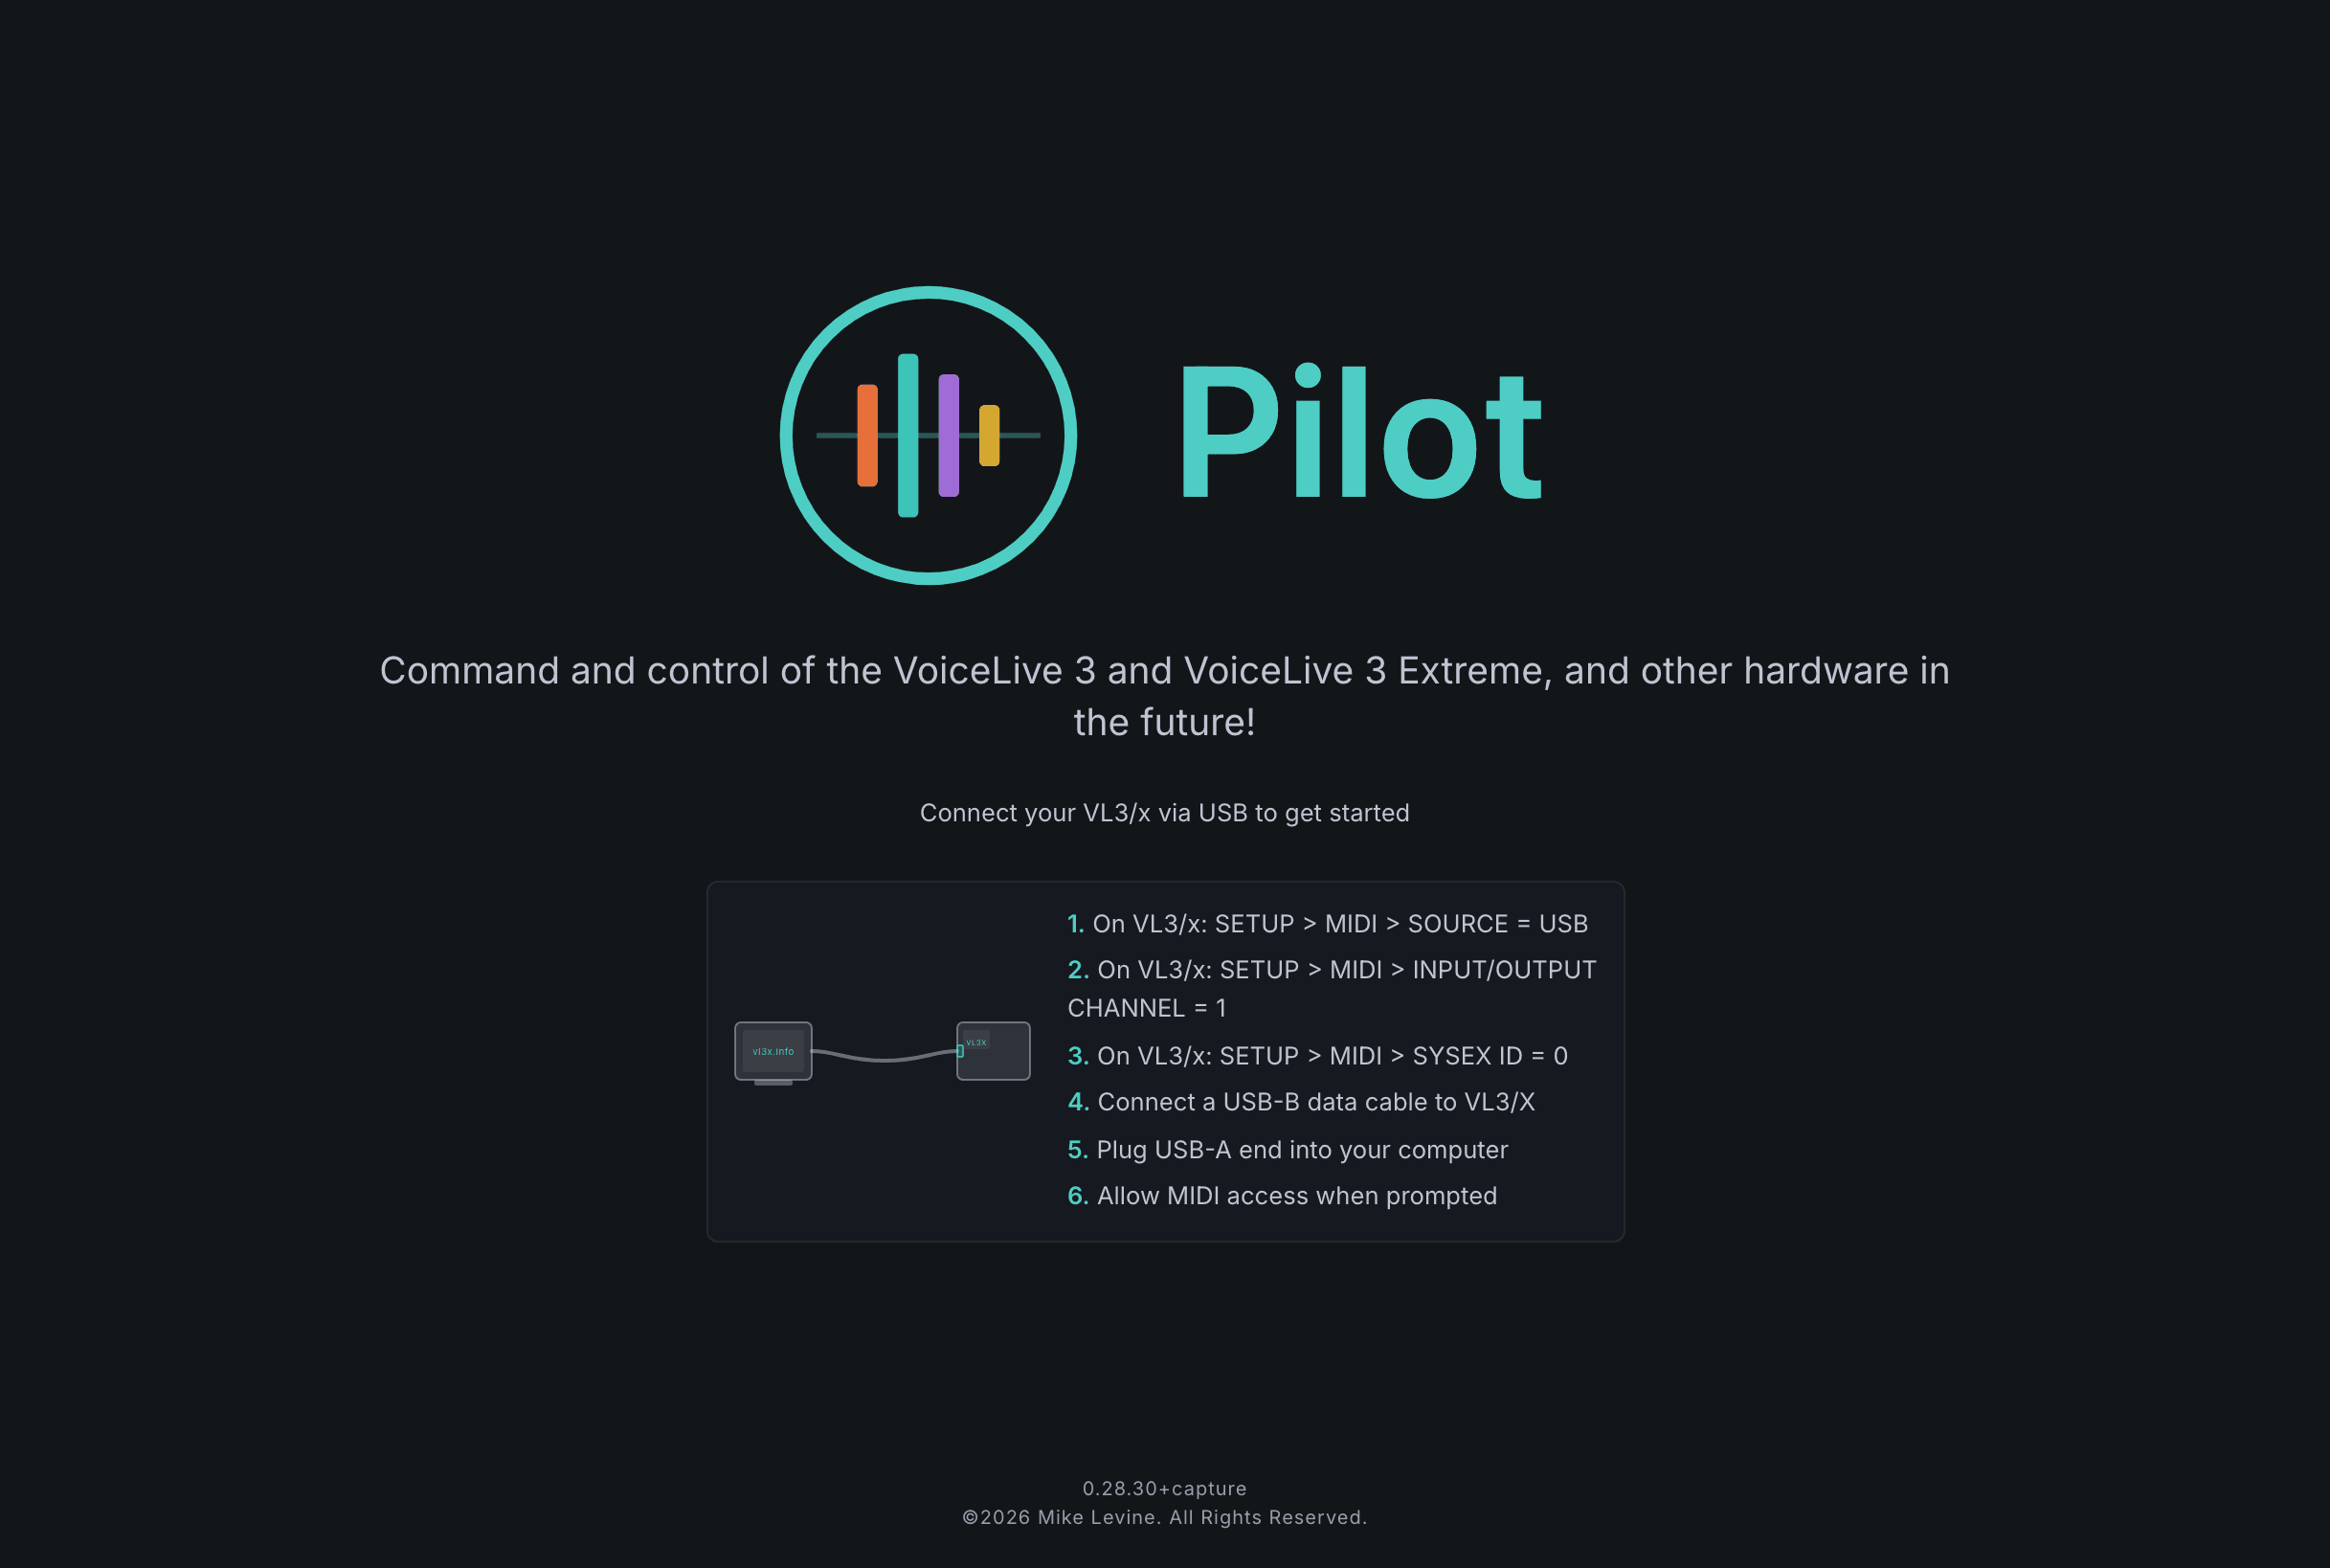
- The landing page displays a USB connection diagram and a "Connect" button. Click it. Pilot scans for your device and, once it finds it, reads all 500 preset slots from the device.
The scan takes a few seconds depending on your system. A progress bar tracks the read. When it reaches 100%, Pilot fades out the landing screen and takes you straight to the Guitar Amp view so you can start editing.
Connection Troubleshooting
If Pilot cannot find your device, you will see the screen below with a "No VL3/x found" message and a connection guide.
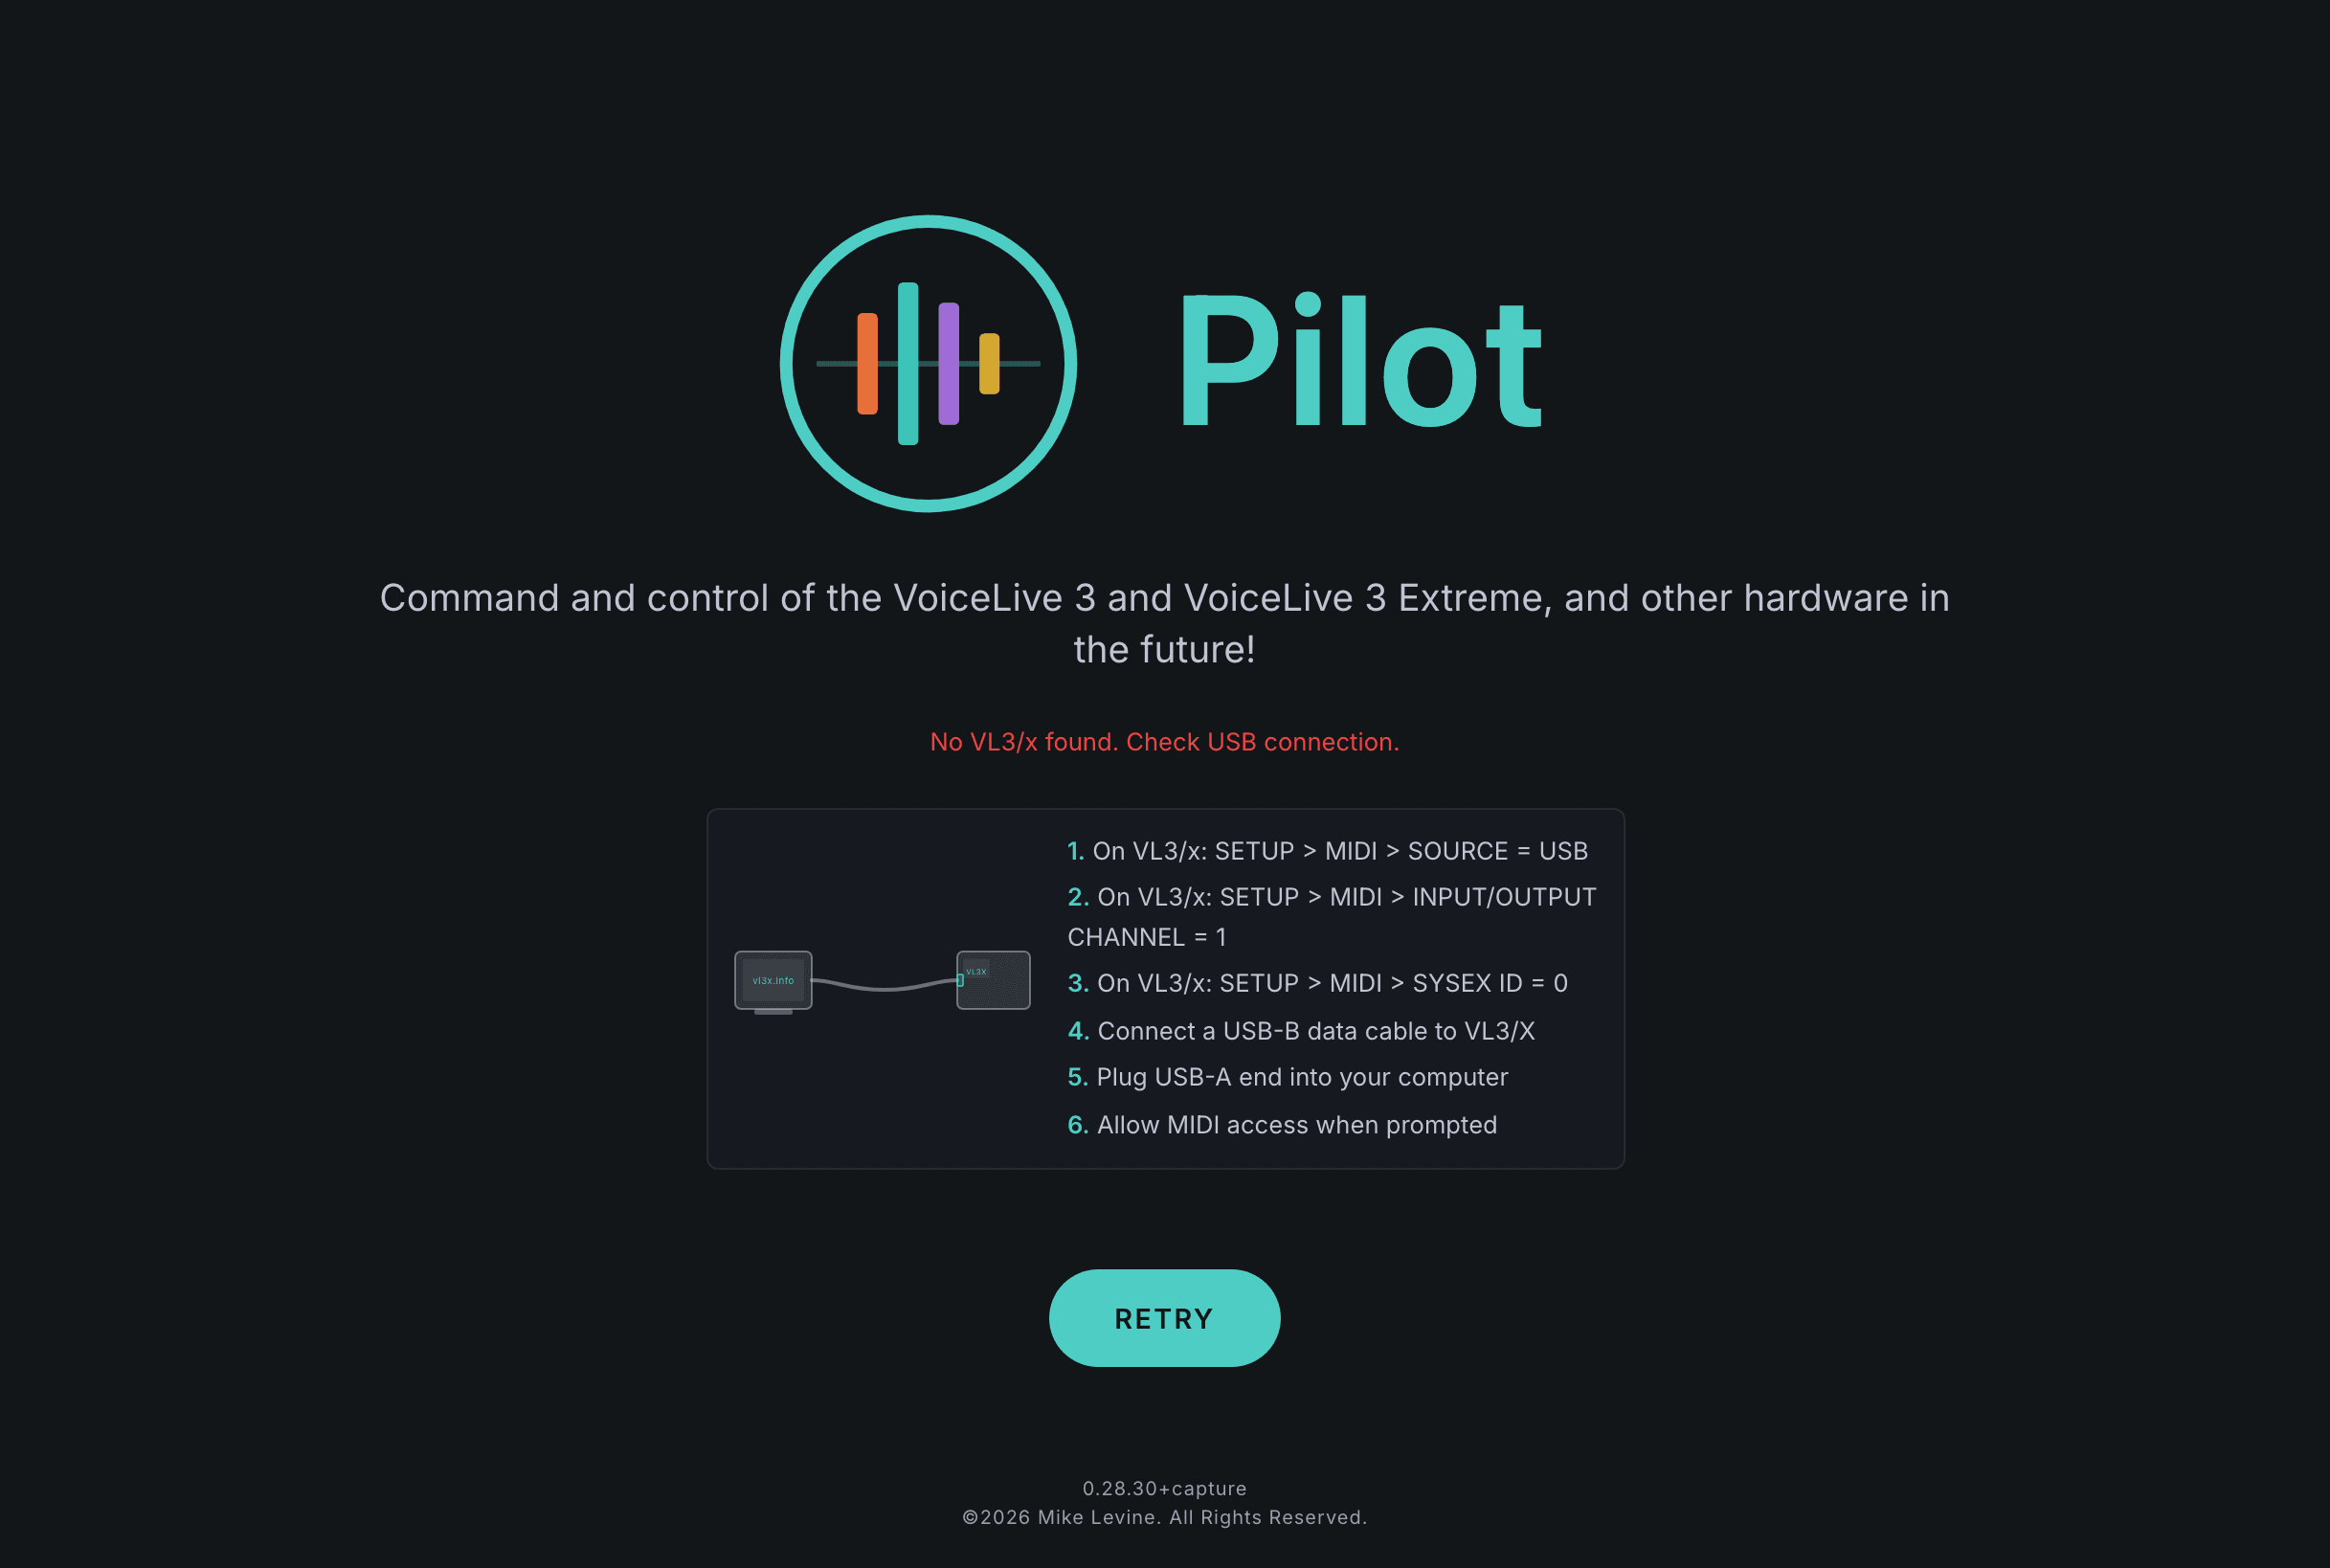
The most common reasons:
- Non-WebMIDI browser: You are using Safari or another browser that does not support WebMIDI. Switch to Chrome, Edge, Firefox, Opera, Brave, or Vivaldi.
- VL3/x MIDI setup: On the VL3/x, go to SETUP > MIDI > SOURCE and confirm it is set to USB. If SOURCE is set to something else, Pilot cannot communicate with the device over the USB connection.
- iPadOS: WebMIDI is not supported on iPadOS.
- "No device found": Check that the USB cable is seated firmly at both ends. Confirm the VL3/X is powered on and showing its normal home screen. Try a different USB port, preferably one directly on the computer rather than a hub.
- Browser permission prompt: The first time you connect, your browser may show a permission dialog asking whether to allow access to your MIDI device. Click Allow. If you accidentally clicked Block, you can reset the permission via the browser's site settings (the lock icon in the address bar).
The Pilot Interface
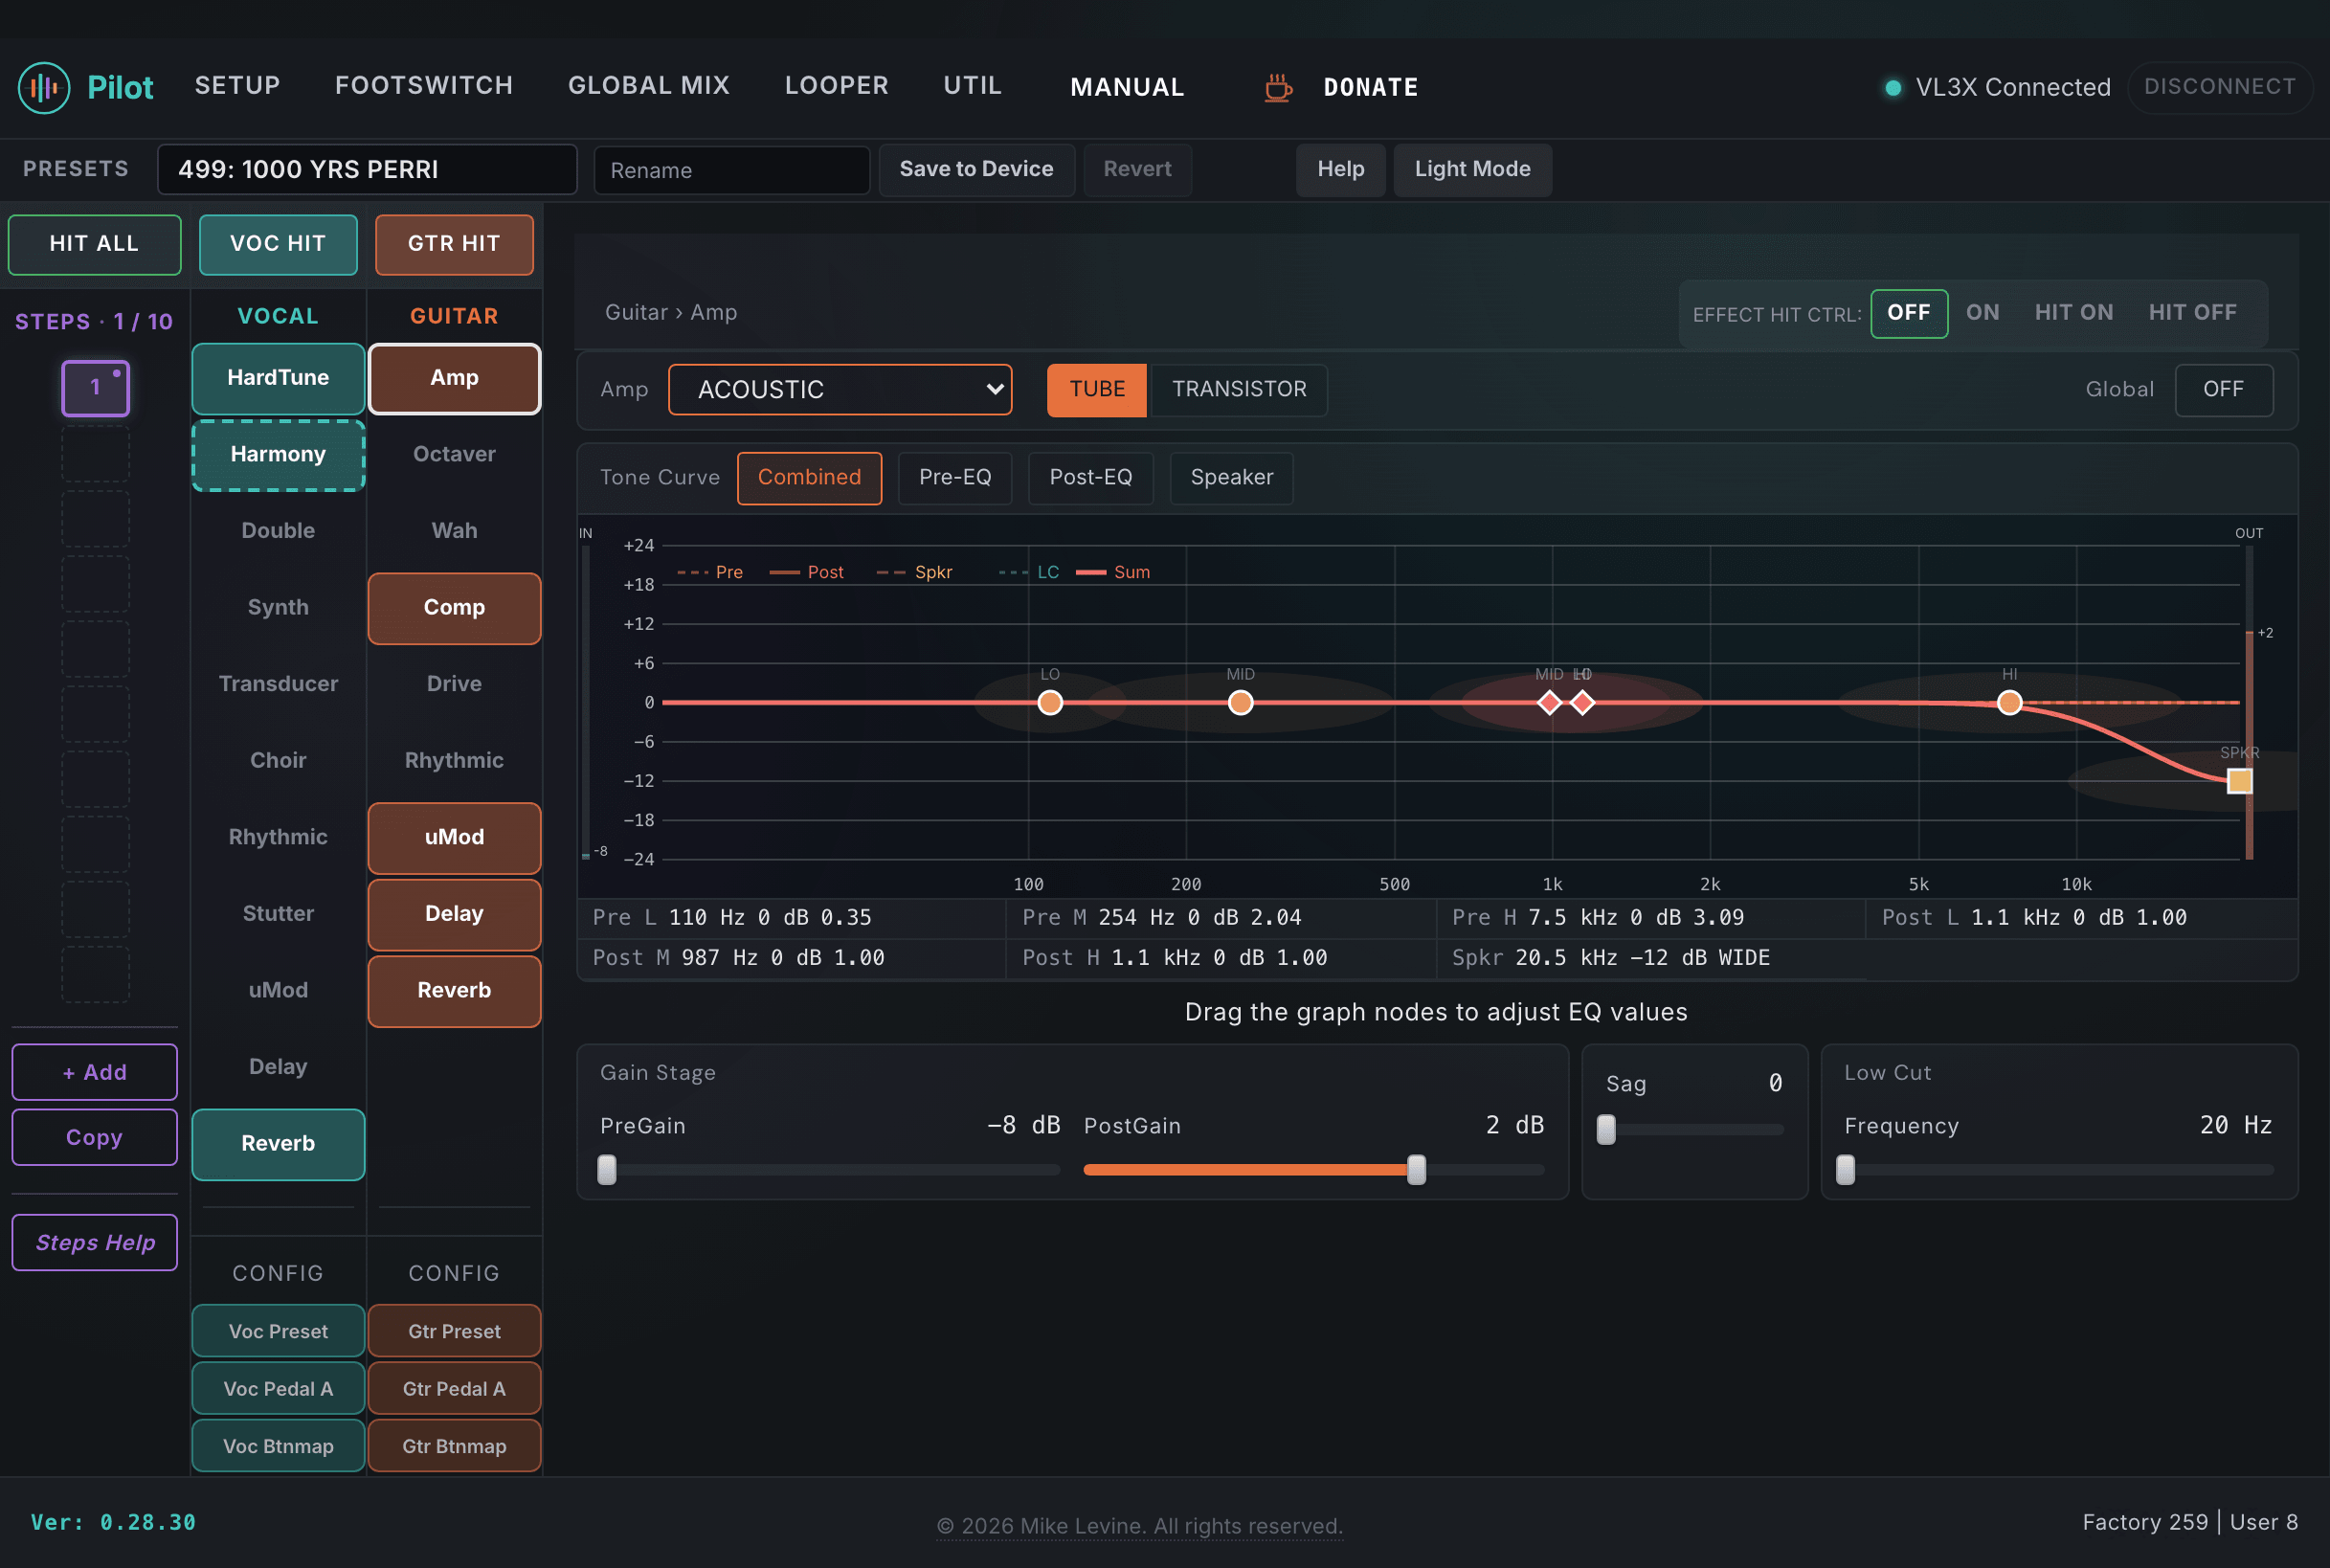
Once connected, you are looking at the main editor. Here is a quick map of the key areas.
Top Bar
Running across the top of the page, the top bar holds the current preset name, a change counter that increments every time you modify a parameter, and two action buttons: Revert (discard all unsaved live changes and re-read the stored preset from the device) and Generate SysEx (build SysEx command strings from the current live parameter state for use in an external MIDI controller). A Help button at the right end opens a contextual help panel that explains the parameters in whatever view you are currently looking at.
Preset Bar
Below the top bar, the preset bar gives you search and filter controls for navigating your 500 preset slots, plus Save and Load buttons.
Category Tabs and Subcategory Tabs
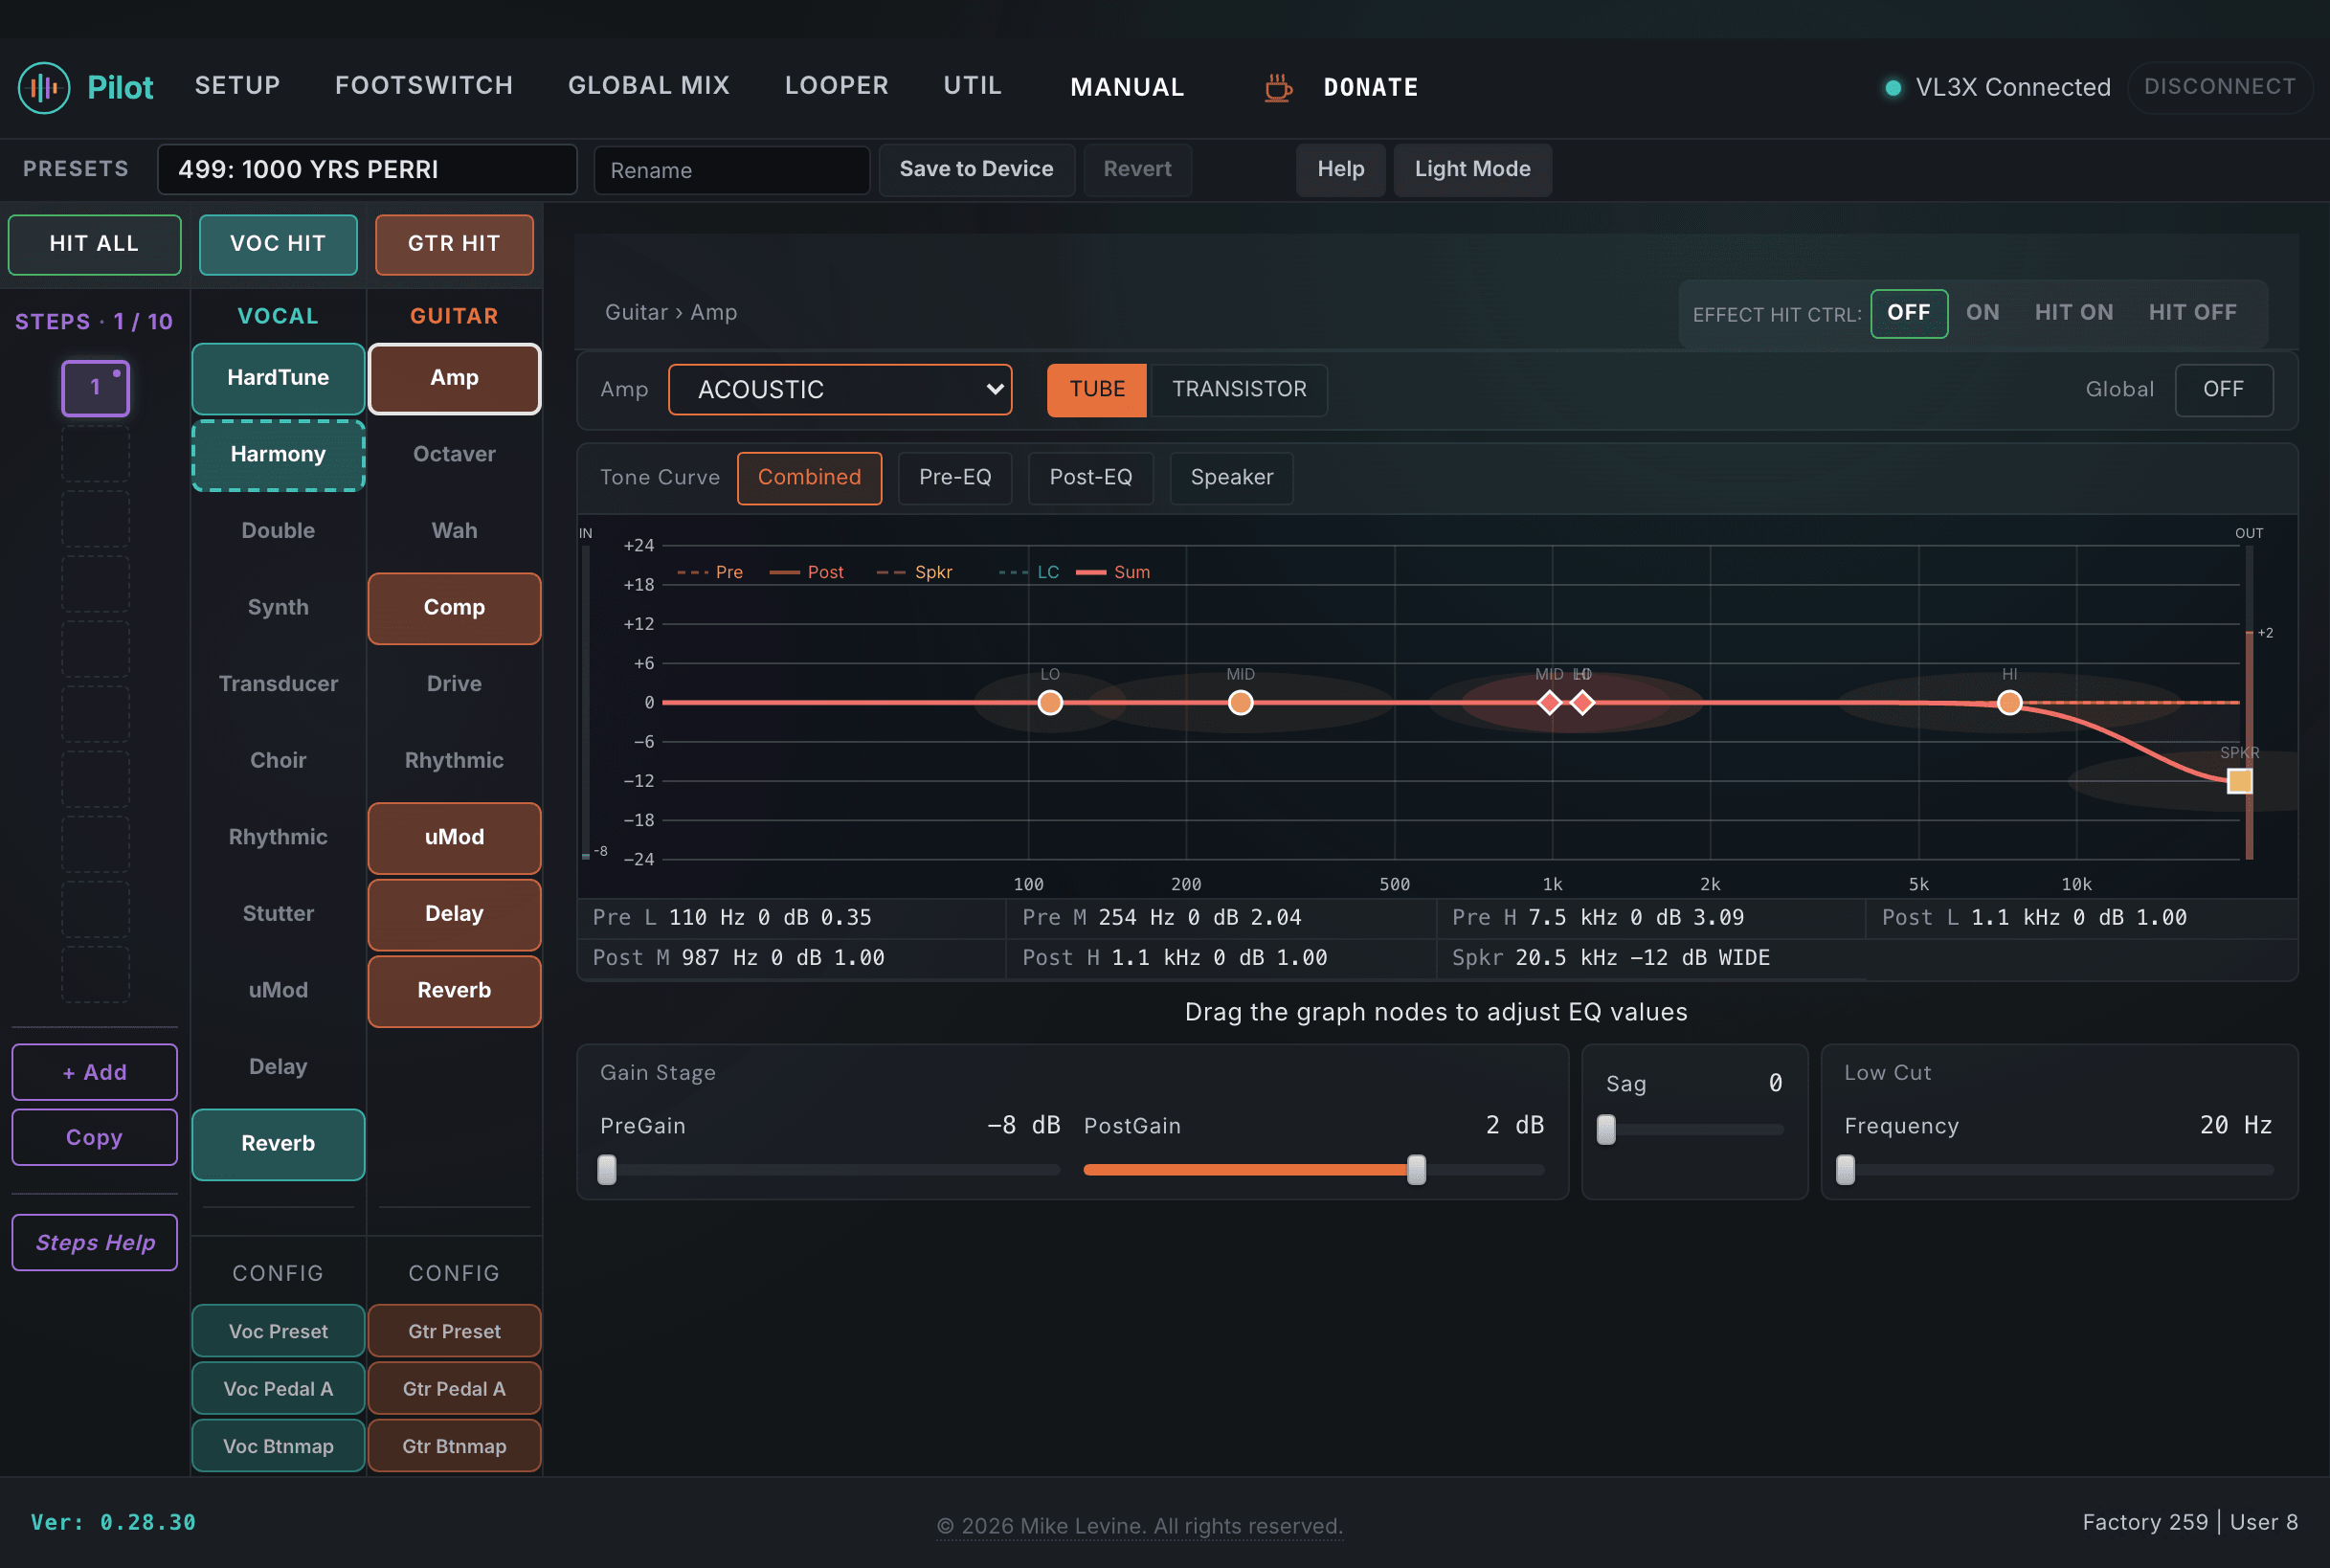
Pilot's navigation has two parts. A row of category tabs (Setup, Footswitch, Global Mix, Looper, and Util) covers the global and utility areas. The Vocal and Guitar processing areas open from their blocks in the signal-chain view, and Presets has its own Step Deck view. Selecting a category or block reveals a subcategory row beneath it: Guitar gives you Amp, Octaver, Wah, Comp, Drive, Rhythmic, uMod, Delay, and Reverb, while Vocal gives you HardTune, Harmony, Double, Synth, and more.
Live vs Saved State
Every Guitar or Vocal parameter change you make in Pilot is sent to the VL3/x immediately. The device starts using the new value the moment you change it. This is the live state: what the hardware is actually running right now.
The live state is your experimental canvas. Adjust anything you want, twist every knob, try wild settings. Nothing is permanent until you save. If you don't like what you hear, just navigate to a different preset and back again. The VL3/x reloads the saved values for that slot, and your experiments are gone. No harm done.
When you land on something you want to keep, click Save to Device in the preset bar. That writes the current live state into the preset slot's permanent memory on the device. Once saved, those values persist through power cycles and preset changes. The change counter in the top bar resets to zero, confirming the save went through.
This distinction applies to Guitar and Vocal preset parameters only. All other settings (Setup, Mix, system-level) are saved to the device immediately when you change them.
Making Your First Edit
Guitar amp type is a good starting point for seeing real-time editing in action:
- Click the Guitar category tab.
- Select the Amp subcategory.
- Change the Amp Type to a different model. You hear the result instantly on the device.
- The change counter in the top bar increments, tracking your unsaved edits.
- Try a few more changes. If you don't like the direction, navigate to a different preset and come back. Your saved settings return.
- When you're happy, click Save to Device to write the live state to the preset slot.